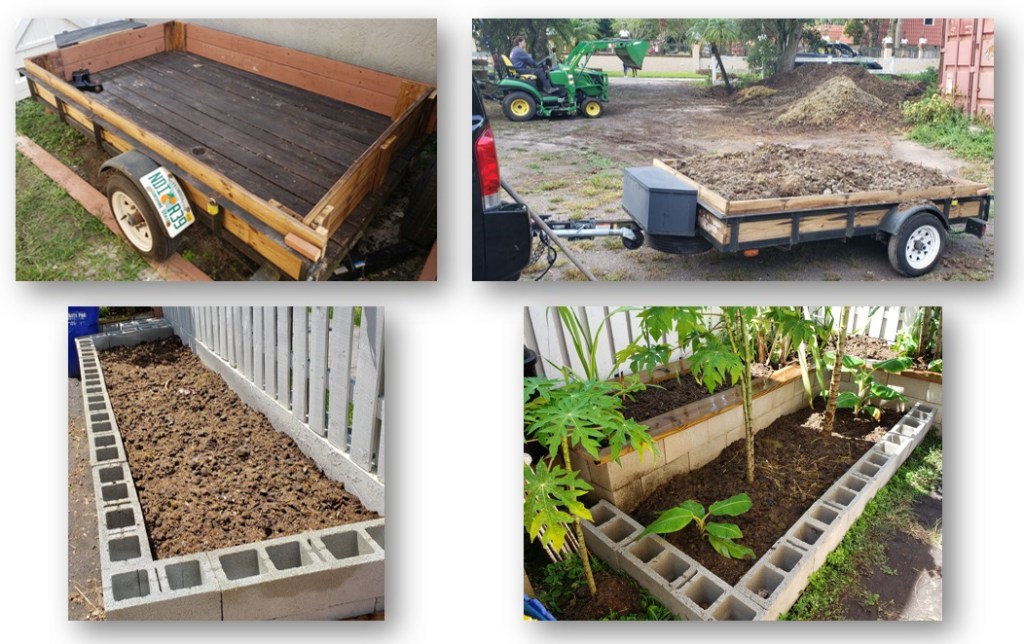
Concrete Masonry Blocks
Hugelkultur
Cultivation
Part 2 – Construction
Fill: Fertilizer/Topsoil/Rock
Compost Bin
General Attractiveness
Concrete Masonry Blocks
This was my first project using Concrete Masonry Blocks. I wanted to build a raised garden bed which would not rot and eventually needing to be rebuilt.
I picked up a pallet and started laying out the shape. Once I had the shape set, I dug out as much dirt as I could, to save on how much I would need to buy.
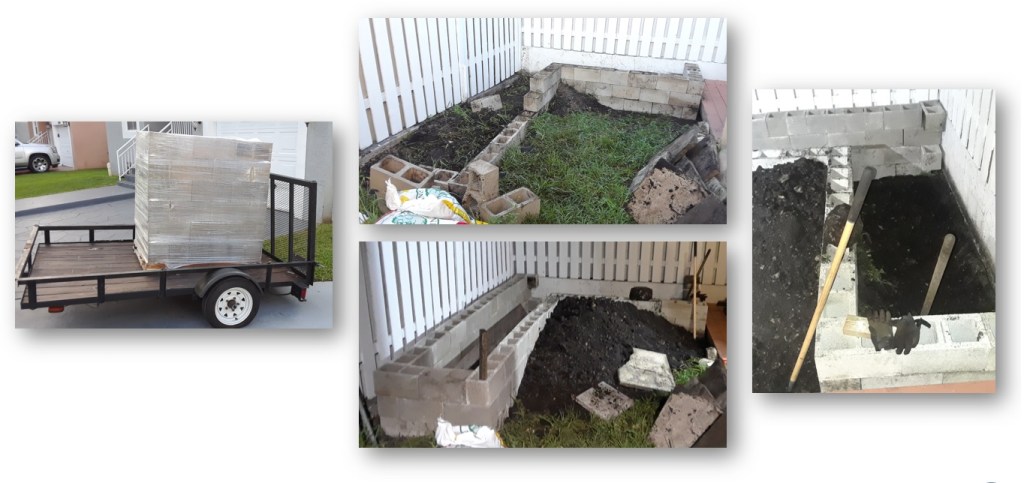
Takeaway: Spend time to start with a level and consistently even foundation, any inconsistencies are compounded the higher you go.
Hugelkultur
A gardening method where a mound constructed from decaying wood debris and other plant materials is layered in a raised bed. This technique helps to improve soil fertility, water retention, and soil warming, thus benefiting plant growth.
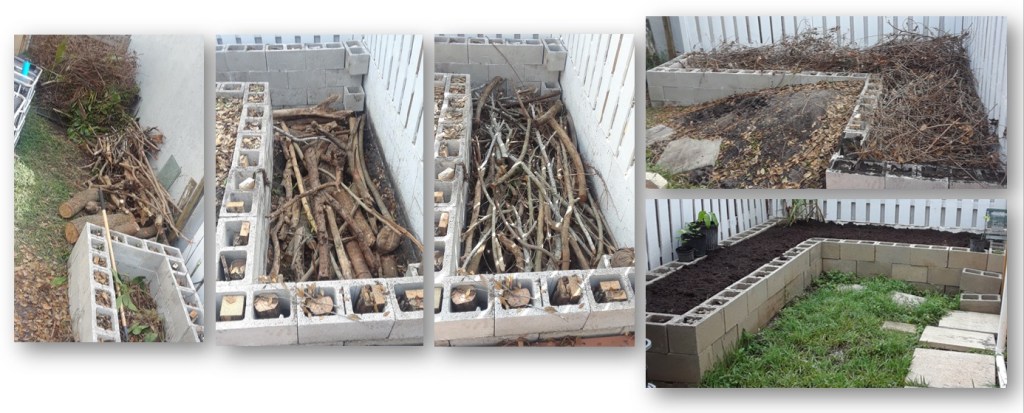
Using the wood from a cut down tree, I started filling the planter box with the largest pieces, then progressively thinner and thinner pieces were used, until the form was filled. I then backfilled all of the dirt I had dug out, and topped the bed with a few bags of garden soil
Cultivation
The first thing I planted in this box was a single piece of sugar cane, which I have been able to cut at the nodes and have multiplied and multiplied over time.
I also started Papaya plants from seeds which grow excellent, in my grow zone; 10b.
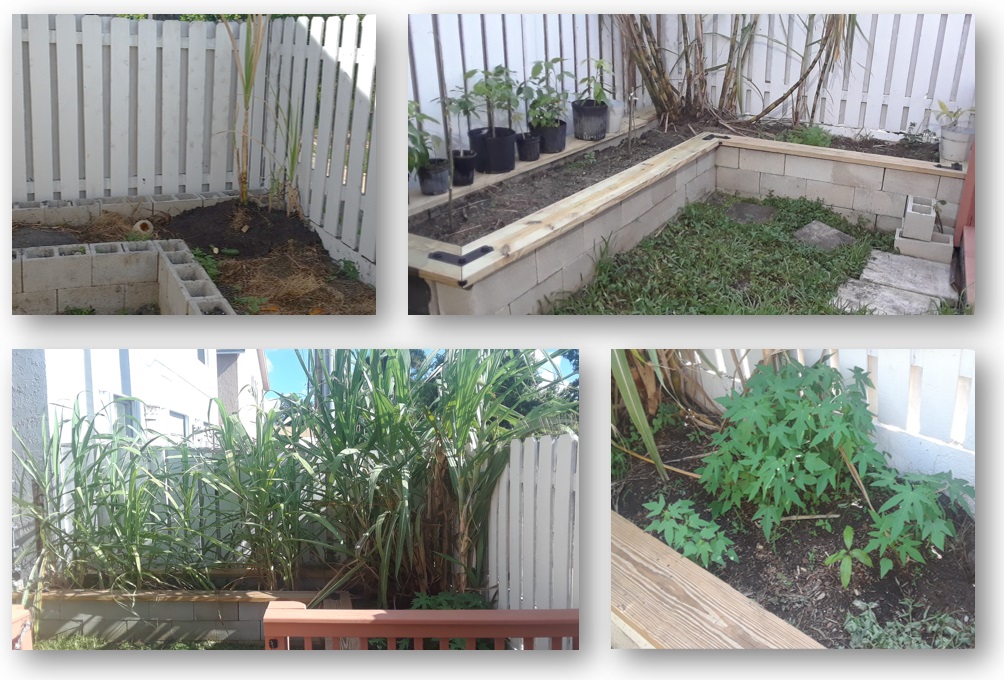
I finished off the top with some 2×10’s and some fancy pergola brackets for a finished look.
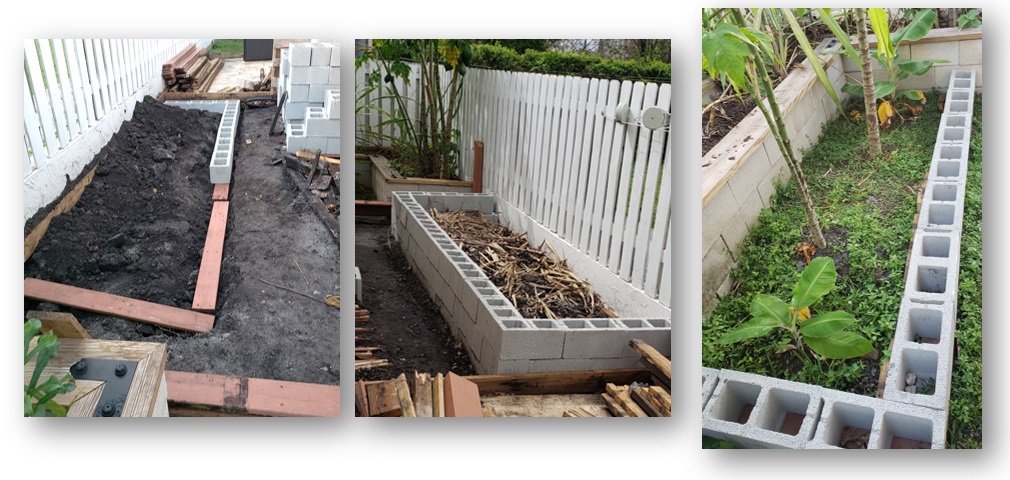
Construction
I have really enjoyed having a garden and decided to expand. I removed the back portion of my deck to build another planter box . I used some of the old deck boards to create a level foundation for the form (takeaway from the first build), filled the same way and created a lower layer off of the first box.
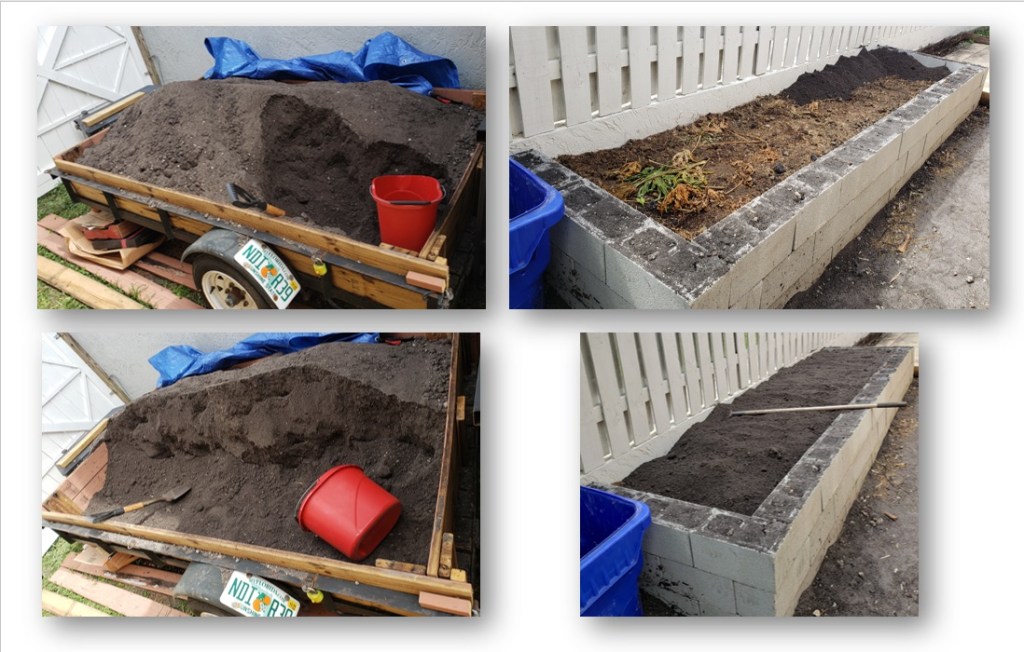
Fill: Fertilizer
I reached out to a local stable and asked if they would be willing to part with some of their manure, they were more than happy and offered to load it with their tractor. I used some of the deck planks to create sides for my trailer and filled it up a few times.
Fill: Topsoil
I picked up some a few scoops of topsoil from a local nursery and bucketed the soil on top of the manure and yard waste. I contemplated buying a wheel borough, but this small bucked worked well, as this was most likely a 1-time type of project. I mention this as encouragement to anyone who may hesitate on taking on a project like this. Take your time, it goes faster than you think it will!
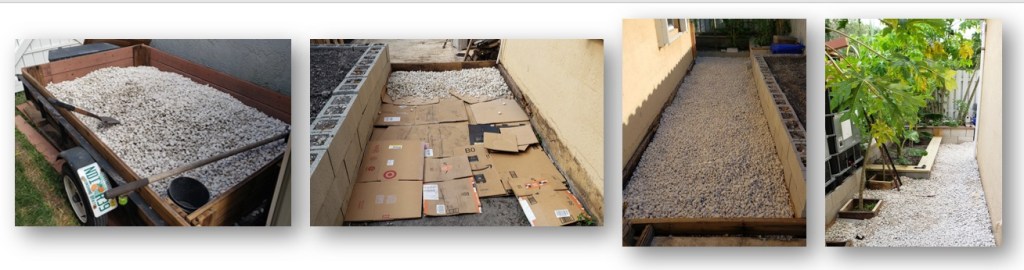
Fill: Rock
I picked up some landscaping rock to finish off the space. I have seen people use cardboard boxes as a weed barrier, so I laid the boxes down and proceeded to bucket in the rock about 3 inches thick. A few months have passed since I have covered the dirt with cardboard and rock, and I yet to see any weeds grow though!
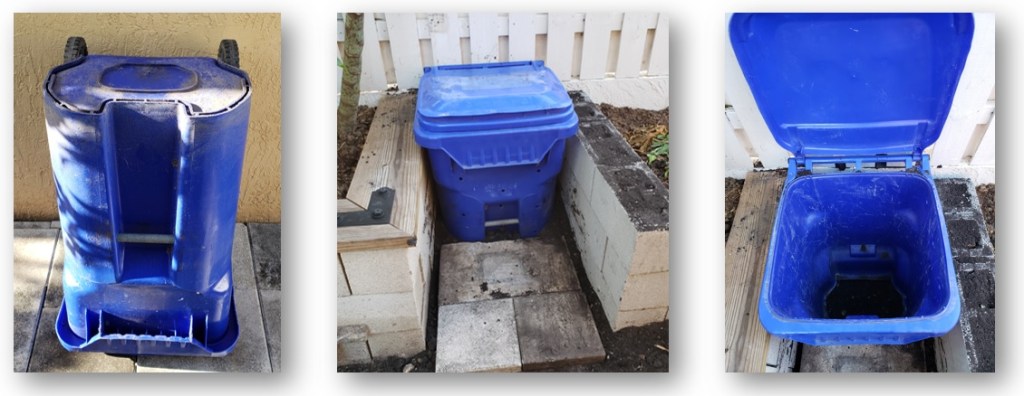
Compost Bin
My city no longer separates our recyclable material in a separate bin. I cut the bottom off of this bin with a jig saw and drilled holes on every side. I then buried it halfway in-between by raised gardens. I started dumping all of my kitchen scraps, and shredding all of my junk mail. This compost bin as worked out better than expected as there is no discernible odor and small animals are unable to open the lid
General Attractiveness
I picked up some 2×10’s and used my router to recess the pergola brackets for both garden beds.

The best time to plant a tree was 20 years ago. The second best time is now
