What is the point of having a pergola?
A pergola is different from a pergoda in that the roof is open to the elements, not providing coverage. I chose to go with a pergola over a pergoda as I intend to train vine plants up and along the structure. While the slats do provide some shade from the sun at the right angle, most of the light will still pass through.
- On the other side of my house, I have a large covered patio which we use for sitting and entertaining. If I did not have this covered area already, I would have chosen to build a pergoda, as this is used to provide shade for sitting.
Time to complete this build alone took 1 month of evening and weekends.
- 6”x6”x12’ beams were challenging to move, but after strapping one end to a dolly, I was able to move with relative ease. Raising the 16’ lateral supports were also challenging which I was able to overcome by using ratcheting straps, raising one side a little, them moving over to the other.
- Tools used to complete this build ; miter & circular saws, sawhorses, router, sander, bar clamps, drills, measuring gauges and levels.
- Total material cost was around $800
Notching
I started by quickly planning any high spots and marking out the shoulders on all 3 pieces, then running the circular saw to create the reliefs for the notches to accept the beams.
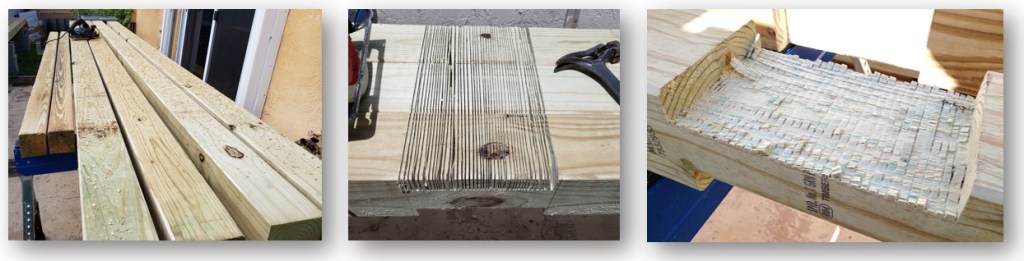
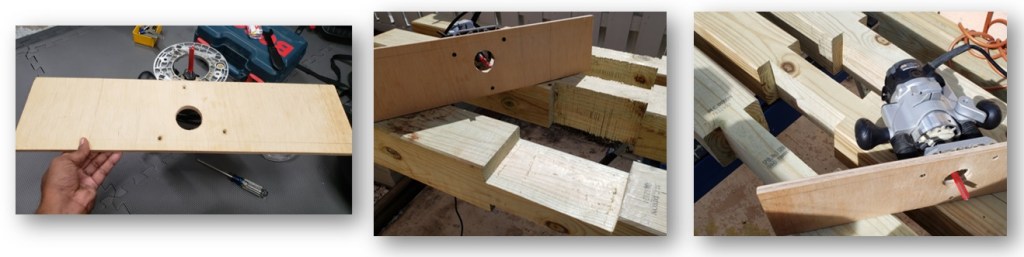
Routing
I used an offcut piece of plywood to make a jig for my router which could straddle the width of the shoulders to accept the beam. Using a deep straight bit, I cleaned out the cut lines and any left-over material on the beams.
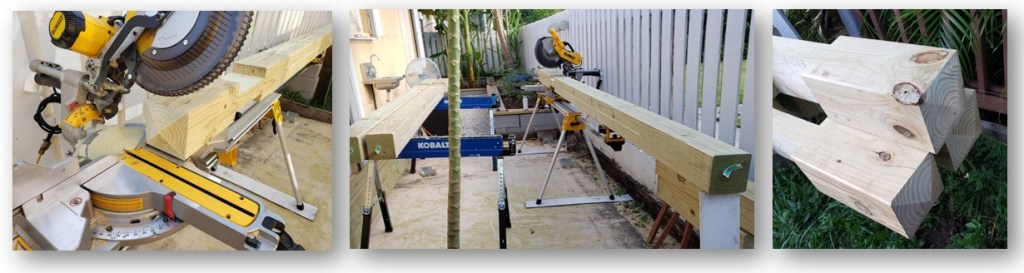
Post Caps
I set the miter on to 22.5°and marked around the post to create these nice caps.
- If I were to do this again, I would make the degree more acute, as these are 11’ off the ground, they are not noticeable when standing below.
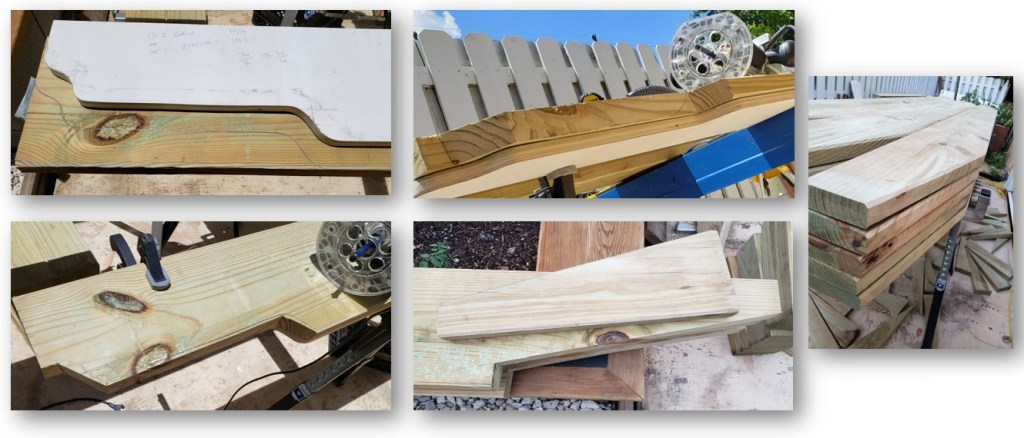
Decorative ends
I made a decorative template, which I intended to use for the ends of the beams. I clamped the template to the underside of the beam and used a 3” flush trim bit to trace along the template. I purchased this bit for this project and upon my first use, the bearing spun off, and I gouged the beam to an unusable point. Takeaway: try out new bits and tools on scrap pieces. I ended up salvaging the beam by taking a straight cut to the width of the posts and saving as much as I could. This option ultimately worked better as there was less cutting. I am pleased with the final product as this style looks much more modern than the curved end pieces. I used the offcut of the beams to cut the rafters to match
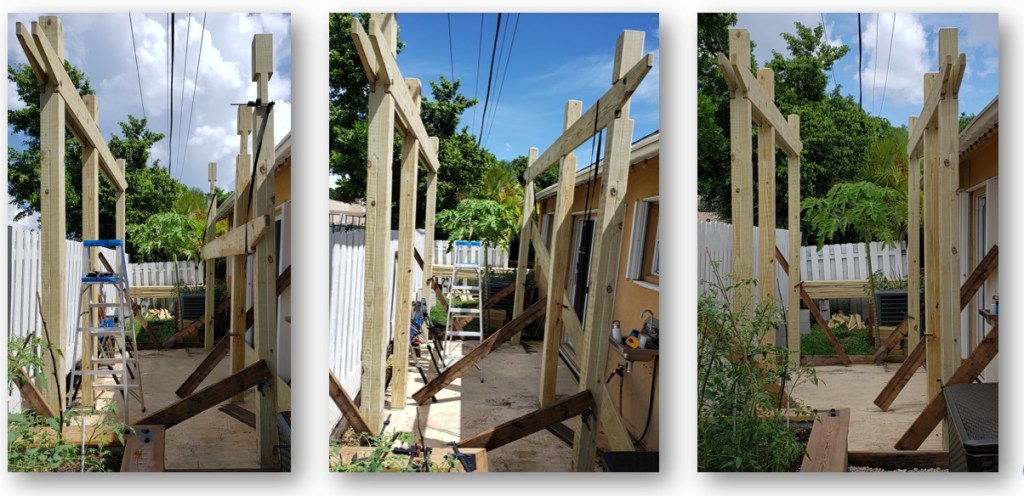
Framework
Using cam buckle straps clamed to the top of the beams, I suspended each end and move the ladder back and forth raising each side into place.

Repeating the process on the other side, while using braces on the posts until I tie in the top rafters. Its starting to look like something now!
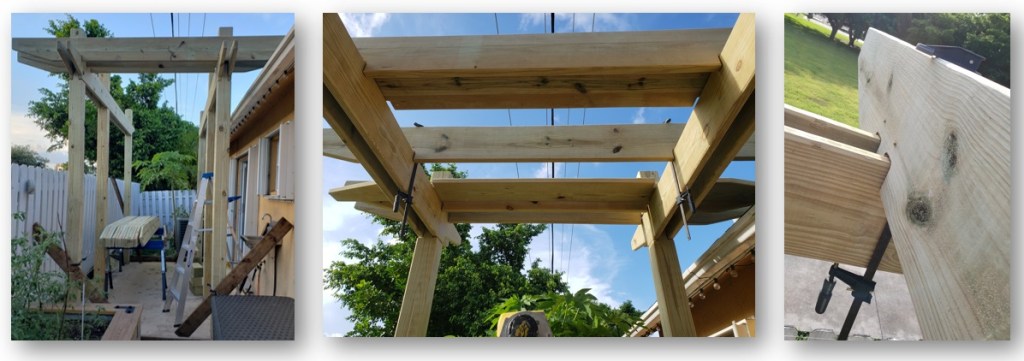
Rafters
I marked the rafter by laying one on top and completely finished the edges to double check that this would work. Once confirmed I strapped the bundle together and made a few passes with the circular saw, then a mallet and chisel to take out the bulk of the material, finally cleaning with the router and rounding over the edges

Starting at the posts, I clamped and screwed the beam in place by drilling and countersinking on each side of the frame
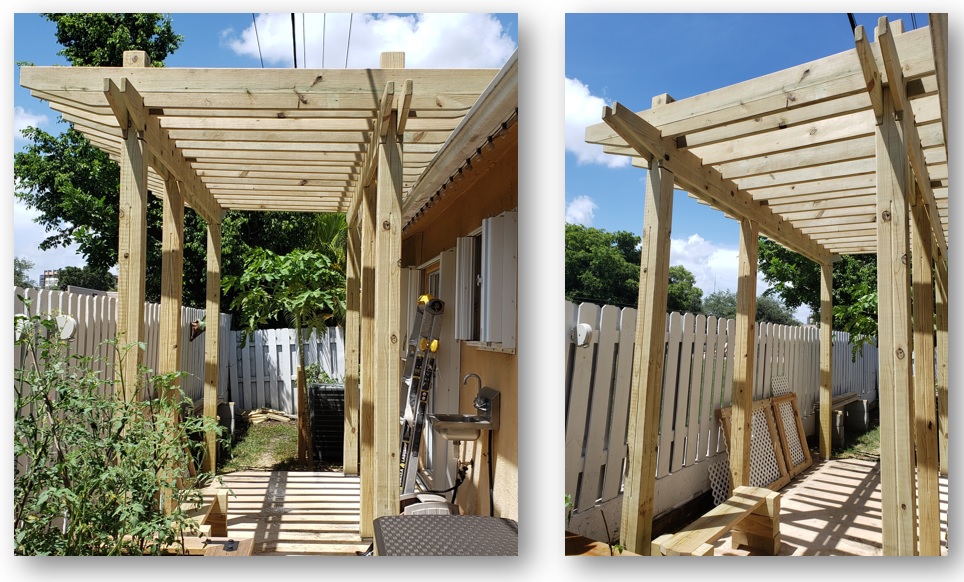
Fin
Overall very pleased with the way this project turned out. I have to wait a month for the wood to dry before I seal the wood and then wire in some lights and a few other odds and ends.

One thought on “Pergola build”