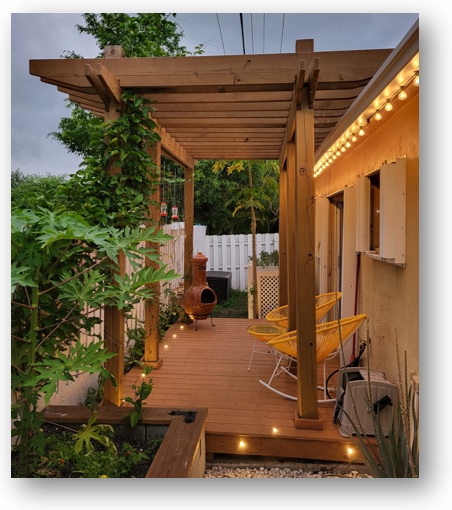
My intention has always been to build a patio under the pergola I built, below are the steps I have taken and some of my takeaways which I would like to share to help others who may be planning a patio build in the future.
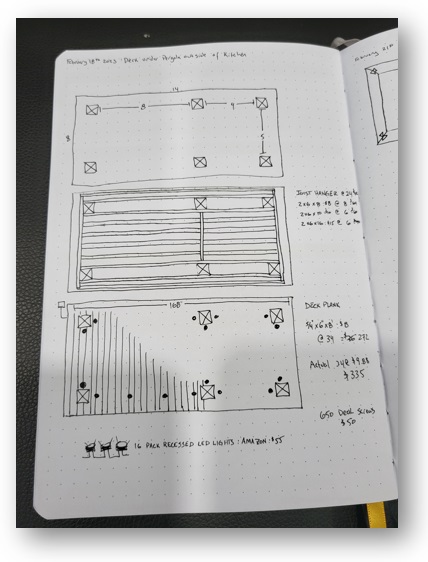
With all of my projects, I always start with a sketch to help me plan the items and qty’s I need. I also always buy 1-2 extra of everything in the event or errors on my part or defects in the material.
Frame:
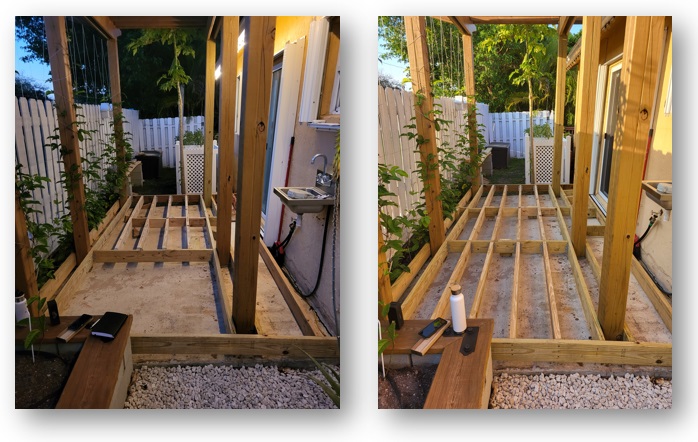
- I started to frame the patio by running beams along my posts. I went with a 12” spacing as I have done 16” in the past but could feel the flex of the deck planks when walking.
- As you can see from the pictures, I did this over 2 days. Takeaway, allocate the time needed to complete projects and do not rush the process. The outcome will always be better by taking your time.
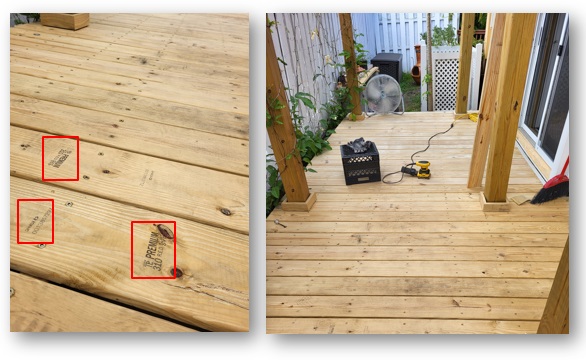
Deck Planks
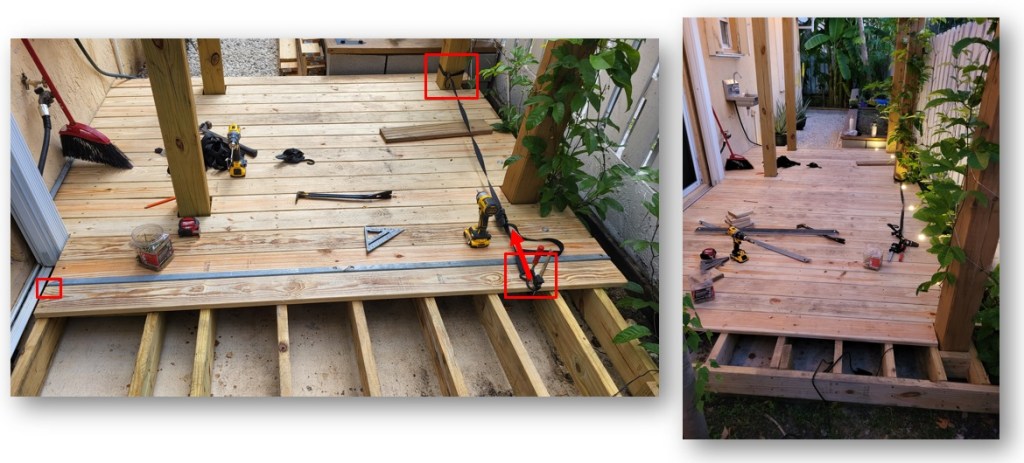
- I started to lay the deck planks, using a few pieces of angle iron to space the boards evenly. Spacing is important because if you butt the boards against each other, debris cannot pass through and you will cut off ventilation, which will cause premature rotting, especially in my humid South FL climate.
- To straighten the boards, I would put 1 screw in (on the left side) an use a ratchet strap to pull the boards straight, and then screw them in. This method worked really well, especially doing this project solo.
- I would also recommend using a scrap piece of wood/making a template, to evenly space all of the screws on the plank. This did take extra time, but I think the outcome was worth it. This goes back to my not rushing point.
Post base cover:
- I made some base covers for my posts. I needed to do this because as the posts dried, they twisted. In the last picture you can see the twist. To hide this, I ripped a deck board, keeping the factory rounded edge to create these little caps.
- If I were to do this project again, I would have anchored the 6×6 plates into the concrete more securely. I could have started the patio project sooner, or tied the beams together, which would have prevented this twist as they dried.
- I used a framing square to space the cap off of the deck about 1/8″ to allow water to drain away

Surface prep:
- After letting the boards dry for a few weeks, I started the process of prepping the surface for a stain water sealer.
- Often when selecting the good side of the board for the top, the boards were marked with the mfg stamp. I used my sander to knock off any markings or splinters.
Stain / Sealer:
- Starting at one end, and leaving myself an out; meaning I could exit once finished without walking over the wet area, I had a roller and paint brush ready.
- I used a paint brush to work the seams, a few boards at a time.
- Takeaway: I would only do the seams on a few boards, as you need to maintain a wet edge.
- If I would have painted all of the seams/edges (against the house) first, and the stain had dried, the stain would leave a different color after being rolled.

Fin:
- I am pleased with the outcome of this patio, the passion fruit vine is growing well, and we are treated with an abundance of butterflies.
- I hope this is helpful, if you are thinking of a project like this and you have any questions or would like to bounce any ideas off of me, please let me know.

